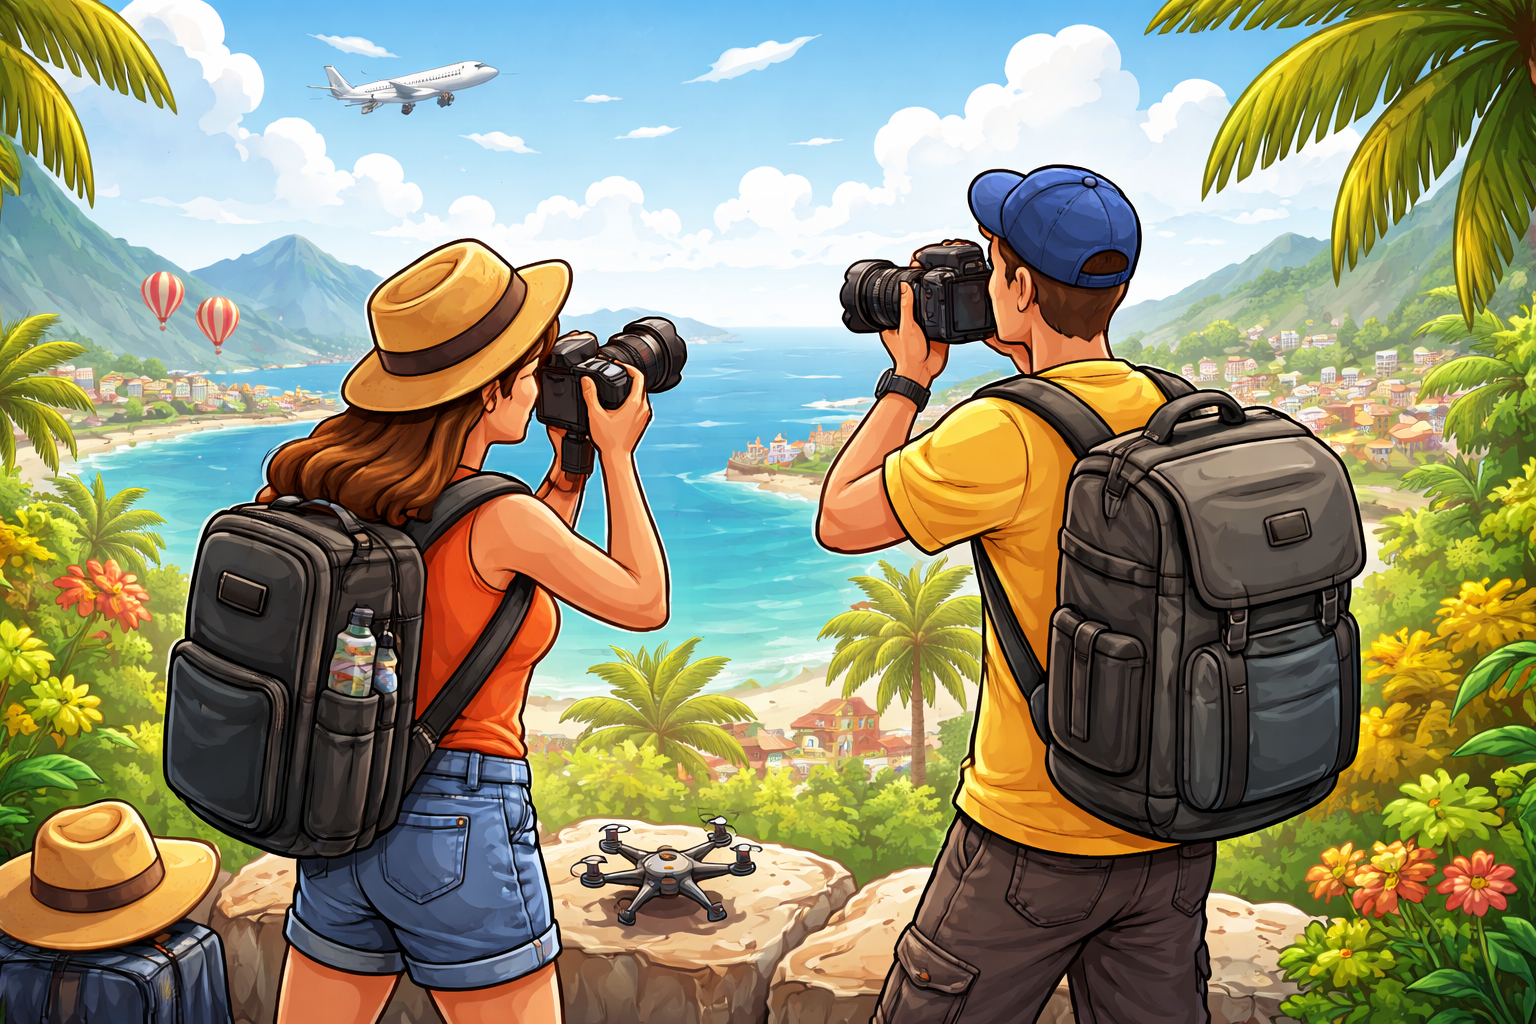
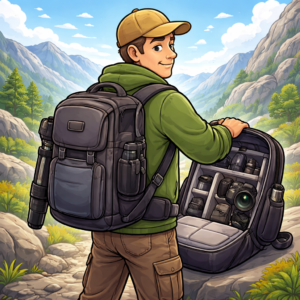
Best Camera Backpacks for Travel Creators
Best Camera Backpacks for Travel Creators
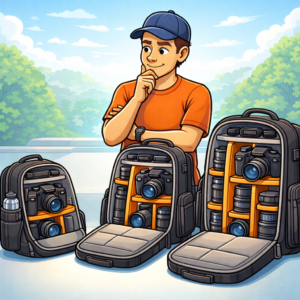
I used to think any backpack with padding would work for carrying camera gear while traveling.
That assumption cost me a cracked lens filter in Prague and a scratched camera body in Thailand before I finally realized that proper camera backpacks serve as mobile workstations designed specifically for the chaos of content creation on the move.
Understanding What Actually Makes a Camera Backpack Different
The basic difference between a regular backpack and a proper camera backpack stays hidden until you’ve actually tried to work from both. Regular backpacks treat your gear like static objects that just need to get from point A to point B.
Camera backpacks for travel creators function as dynamic systems that support rapid equipment changes, protect against environmental threats, and combine seamlessly with the workflow of someone who’s constantly shooting, moving, and adapting.
The theoretical foundation here centers on understanding the distribution of impact and the architecture of accessibility. When you’re carrying fragile glass elements worth thousands of dollars, the padding system needs to dissipate force across many planes.
A single-layer foam system might protect against minor bumps, but the sophisticated suspension systems in quality camera backpacks use multi-density foam combinations that compress at different rates depending on impact severity.
The outer layer absorbs initial shock, the middle layer distributes force laterally, and the inner layer provides a final cushion against direct contact with your gear.
From a practical standpoint, this translates to bags that can handle the actual punishment of travel. I’ve watched my camera bag get tossed onto airport tarmacs, wedged under bus seats in Southeast Asia, and dropped onto rocky terrain during mountain shoots.
The difference between a $50 bag and a $250 bag becomes crystal clear after the first real incident.
Cheap padding compresses permanently after a few impacts, leaving your gear increasingly vulnerable with each trip. Quality padding recovers its shape, maintaining protection year after year.
The accessibility challenge proves equally important but often gets overlooked by first-time buyers. You’re running a mobile production studio.
The best camera backpacks recognize that you might need to swap lenses twelve times in an hour, pull out batteries on the fly, or grab your gimbal without unpacking your entire system.
This means intelligent compartment design where frequently accessed items occupy quick-reach positions while rarely needed gear stays secure in deeper pockets.
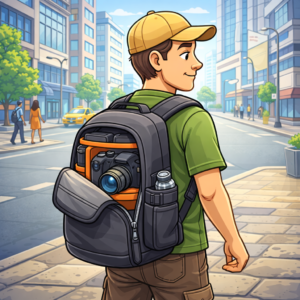
Weight distribution matters more than most people realize until they’ve carried a fully loaded camera bag for eight hours during a shoot. Bags with proper harness systems transfer weight to your hips rather than having everything hang from your shoulders.
The difference feels minimal when you first put the bag on, but after several hours, inadequate weight distribution can leave you sore for days.
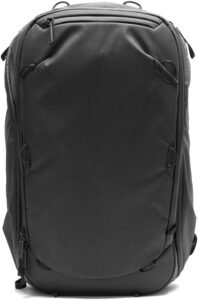
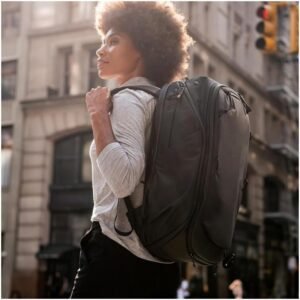
Peak Design Travel Backpack 45L
This bag changed how I think about travel photography entirely. The Travel Backpack 45L operates on a fundamentally different philosophy than traditional camera bags because it was designed first as a travel backpack, which happens to accommodate camera gear brilliantly through modular inserts.
The genius of this system lies in its flexibility. When I’m traveling between locations, I pack it as a standard travel pack with clothes and toiletries, with my camera gear safely nested in the Camera Cube insert.
When I arrive at a shooting location, I pull out the Camera Cube and suddenly have a streamlined setup ready for a day of shooting.
✅ Get Customer Reviews & Best Price
The bag itself adapts to what I’m doing, rather than forcing me to work around its limitations.
The clamshell opening lets me lay it flat and see everything inside without digging through layers. This matters more than you’d think when you’re trying to find that specific ND filter or the extra battery you know exists somewhere in there.
The external carry system lets me strap my tripod horizontally along the side, rather than vertically like in traditional bags, which makes navigating crowded spaces significantly easier.
I can actually walk through doorways and squeeze past people on trains without my tripod catching on everything.
The build quality matches the thoughtful design. The materials feel substantial without being unnecessarily heavy, and the zippers operate smoothly even after years of use.
The laptop compartment fits a 16-inch MacBook Pro comfortably with extra space for a tablet.
The water bottle pockets expand to accommodate larger bottles but compress flat when empty, maintaining a clean profile.
One limitation worth noting is that at 45 liters, this pushes the boundaries of carry-on restrictions on some budget airlines. I’ve had to check it twice in three years of regular travel, which isn’t terrible but something to consider if you exclusively fly carriers with strict size requirements.
The bag also costs more than many alternatives, though I’ve found the investment justified by the versatility and durability.
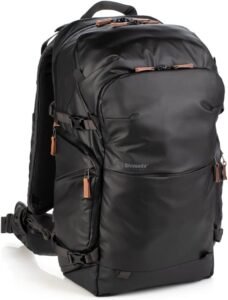
Shimoda Explore V2 35L
The Shimoda Explore V2 represents what happens when actual adventure photographers design camera bags instead of corporate product teams. This bag is designed specifically for people who shoot in genuinely challenging environments where weather protection and durability aren’t optional.
Rear-panel access is absolutely critical for travel creators working in busy or sketchy areas.
When I’m shooting in crowded markets or urban environments where theft is a concern, I wear this bag with the camera compartment against my back, making it virtually impossible for someone to access my gear without me knowing.
The front panel still provides quick access to smaller items, but my expensive bodies and lenses stay secure against my body.
✅ Get Customer Reviews & Best Price
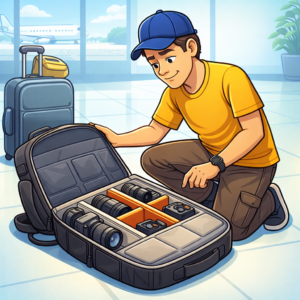
The DSLR Core Unit system inside offers proper modularity, letting you completely reconfigure the interior based on what you’re bringing. For a lightweight mirrorless setup, I can pack one camera body, four lenses, a drone, batteries, and still have room for a light jacket and snacks.
On heavier DSLR days, I adjust the dividers to accommodate bulkier gear while maintaining proper spacing.
The dividers use a hook-and-loop system that actually holds its position, unlike cheaper designs that gradually sag.
What really distinguishes the Shimoda comes down to attention to outdoor functionality. The integrated rain cover deploys in about 3 seconds, the rolltop expansion adds capacity when needed, and the bottom compartment separates wet or dirty gear from clean equipment.
I’ve used this bag for everything from glacier shoots in Iceland to humid jungle work in Costa Rica, and it’s handled conditions that would have destroyed lesser bags.

The fabric resists abrasion better than any other bag I’ve tested, showing minimal wear even after being dragged across volcanic rock and concrete.
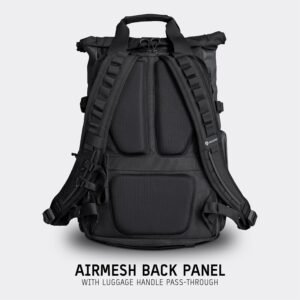
The harness system borrows design elements from technical hiking packs, with a properly padded hip belt that effectively transfers weight. The sternum strap adjusts vertically to match different torso lengths, and the load-lifter straps let you fine-tune how the bag sits against your back.
The main drawback is weight. Even empty, this bag has substantial heft because of the robust materials and frame system.
If your primary concern centers on minimizing carry weight for urban travel, lighter options might serve you better.
The bag also costs significantly more than entry-level alternatives, though the build quality justifies the investment for serious outdoor shooting.
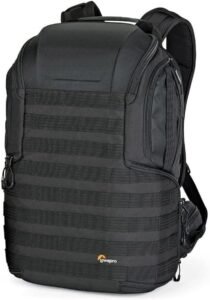
Lowepro ProTactic BP 450 AW II
The ProTactic series has been a workhorse in the photography community for years, and the 450 AW II version refines an already solid design. This represents what I’d call a traditional professional camera backpack, built specifically for camera gear first, with other features designed around that primary function.
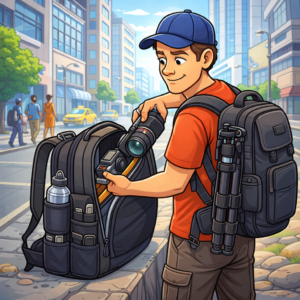
The modular attachment system covering the exterior proves incredibly useful for travel creators who carry accessories beyond just camera bodies and lenses.
I regularly attach SlipLock-compatible pouches for quick access to items like batteries, memory cards, and cleaning supplies.
The system also works with various tripod mounting options, letting you configure external carry based on what you’re shooting that day.
✅ Get Customer Reviews & Best Price
You can mount a tripod on either side or across the back, depending on how you need to access other compartments.
The four-way access design (top, sides, back) lets you grab gear from multiple entry points, depending on the situation. When I’m sitting in a vehicle or airplane, the side access lets me pull equipment without fully removing the bag.
During active shooting, the top access provides quick lens swaps.
The back panel access keeps everything secure when moving through crowds. Each access point uses quality zippers with lockable pulls, adding security when needed.
One aspect that doesn’t get enough attention involves the built-in All Weather AW Cover. Unlike bags where the rain cover exists as a separate piece you need to remember to pack, this system combines the cover into the bottom compartment, where it is always available.
I’ve been caught in sudden rainstorms enough times to really appreciate having immediate weather protection.
The cover deploys in seconds and actually stays put in the wind, unlike flapping around uselessly.
The interior organization uses a traditional divider system with thick padding, providing excellent protection. The dividers attach firmly and stay in place even when you’re accessing gear repeatedly.
The bag accommodates a surprising amount of equipment. I can fit two camera bodies, five to six lenses, a flash, and still have room for personal items in the top compartment.
The limitation here centers on flexibility for non-camera use. This bag is really for camera gear, and while you can pack some personal items, it doesn’t work well for trips where photography is only part of what you’re doing.
If you need one bag that serves many purposes, the more hybrid designs work better.
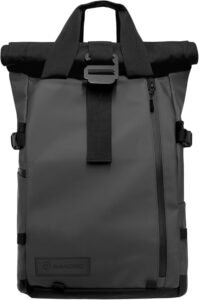
Wandrd Prvke 31L
The Prvke brings a completely different aesthetic to camera backpacks while maintaining serious functionality underneath the sleek exterior. This bag has become my go-to for urban travel and situations where I don’t want to advertise that I’m carrying thousands of dollars in camera equipment.
The roll-top design provides expandability that most camera backpacks can’t match. In compressed mode, it measures 21 liters and fits easily under airline seats.
Expanded, it grows to 31 liters with enough capacity for a weekend trip, including camera gear.
✅ Get Customer Reviews & Best Price
This adaptability means I can adjust the bag’s profile based on how much I’m actually carrying, rather than walking around with a half-empty rigid backpack that maintains the same external size regardless of its contents.
The camera compartment uses a removable Camera Cube insert similar to the Peak Design system, but the Prvke’s approach emphasizes minimalist organization. You’re getting a well-designed space for a couple of cameras and a few lenses, with intuitive spacing rather than a dozen-person divider.
For travel creators working with modern mirrorless systems, this proves more than adequate.
The cube removes completely when you don’t need camera protection, transforming this into a standard daypack.
The laptop compartment positions against your back, which both protects your computer and adds a theft-deterrent layer since accessing it needs removing the bag. The pass-through luggage strap on the back makes airport navigation significantly easier when you’re rolling a suitcase and carrying your camera bag.
The strap slides over your luggage handle and keeps the camera bag stable on top.
The magnetic closures throughout the bag provide quick access while maintaining security. The main magnetic buckle releases instantly without accidentally popping open.
The smaller magnetic pockets on the shoulder straps hold items like memory cards or lens caps within easy reach during shooting.
The overall design looks more like a fashionable urban backpack than a camera bag, which I appreciate in situations where looking like a photographer might attract unwanted attention.
Where the Prvke falls short centers on heavy-duty weather protection. The materials are water-resistant and will handle light rain showers, but this isn’t the bag for extreme-weather photography.
The roll-top closure, while stylish and functional, doesn’t seal as comprehensively as the weather-proofed designs in bags like the Shimoda.
Heavy rain for extended periods will eventually seep in.
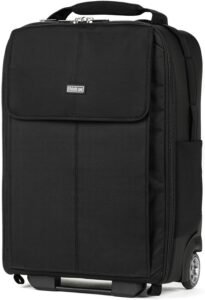
Think Tank Photo Airport Advantage XT
This bag targets a specific use case that other options largely ignore, maximizing carry-on capacity for gear-intensive shoots while maintaining organization. The Airport Advantage XT reaches massive proportions by camera backpack standards, and that is entirely intentional.
The main compartment can hold two pro-sized camera bodies with attached lenses, plus six to eight extra lenses, depending on focal length. For travel creators shooting events, weddings, or commercial work where equipment redundancy becomes critical, this capacity proves invaluable.
I can pack my entire work kit into one bag instead of splitting gear across multiple carriers.
✅ Get Customer Reviews & Best Price
This matters tremendously when you’re traveling to a shoot location and can’t risk essential equipment getting lost in checked luggage.
The organizational system inside uses adjustable dividers that lock into place rather than resting against each other. This seemingly minor detail makes a huge difference when you’re accessing gear repeatedly: the dividers stay exactly where you put them, rather than gradually shifting during travel.
The dividers themselves use thick padding that provides genuine protection even for heavy telephoto lenses.
The front compartment includes designated pockets for memory cards, batteries, cables, and cleaning supplies with enough specificity that you’re not just tossing everything into a general pocket. Small zippered mesh pockets keep memory cards separated and visible.
Elastic loops hold batteries securely.
A larger pocket accommodates charging cables and adapters without tangling.

The tripod mounting system attaches to either side of the bag, rather than the front or back, which better balances the weight when you’re carrying a heavy tripod.
The harness system proves genuinely substantial with thick padding and load-lifter straps that actually work, which you absolutely need because this bag gets heavy when fully loaded.
I’ve carried it fully packed through airports for hours, and while it’s never exactly comfortable at that weight, the harness distributes the load well enough to stay manageable.
The obvious limitation centers on size and weight. This doesn’t function as a casual walk-around bag. It serves as a professional tool for most gear capacity, and using it for anything less than serious equipment loads represents overkill.
It also pushes the absolute limits of carry-on allowances on many airlines. I’ve been asked to measure it twice, even though it technically meets regulations.
Budget airlines with stricter requirements might force you to check it.
Use Our Decision Tool
We created this quiz to help you choose the camera travel bag that best suits your needs. Just answer the 6 questions, and the tool will recommend the best camera bag for your unique situation.
🎒 Camera Backpack Finder
Answer 6 questions to find your perfect travel camera backpack
Your Perfect Camera Backpack:
Choosing the Right Size and Configuration
The single biggest mistake I see travel creators make involves buying camera bags that are too large for their actual needs. A psychological tendency exists to think “I might need to carry all this someday,” which leads to hauling around a massive bag that’s half-empty most of the time.
Your bag should match your realistic working kit rather than your theoretical most kit. If you typically shoot with one camera body and two lenses, buy a bag designed for that setup, plus maybe one extra lens worth of space.
You can always rent or acquire specialized bags for those rare occasions when you need more capacity.
Walking around with extra space “just in case” means carrying unnecessary weight and bulk every single day to accommodate scenarios that might happen once a year.
Consider how your gear mix affects bag requirements. Modern mirrorless systems with compact lenses need significantly less space than DSLR setups with professional zoom lenses.
A 24-liter bag that would be cramped for a DSLR shooter might be perfectly sized for someone working with Fuji or Sony APS-C systems.
I switched from a full-frame DSLR setup to a mirrorless system and immediately downsized my primary bag by 10 liters without sacrificing any capability.
Think about the ratio of camera gear to personal items you typically carry. If you’re doing day shoots where the bag exclusively holds camera equipment, a dedicated camera backpack with limited general storage makes sense.
If you’re traveling for weeks with the same bag serving as both camera carrier and personal pack, hybrid designs that balance both functions work better.
I keep both types of bags because trying to make one bag serve every purpose means compromising on both.
Managing Airport and Security Considerations
Getting camera gear through airports has become increasingly complicated as carry-on restrictions tighten and security scrutiny intensifies. In practice, your camera bag choice directly affects how smooth or frustrating your airport experience will be.
Maximum carry-on dimensions vary by airline and region, but generally, anything over 22 inches in height starts to push the limits. I’ve learned to keep detailed measurements of my bags and to check specific airline policies before travel, rather than assuming all carriers have identical rules.
Budget airlines, in particular, tend to enforce stricter size requirements.
Some airlines measure total linear dimensions (length + width + height) rather than just passenger measurements, which can catch you off guard if you’re not prepared.
The composition and density of camera equipment create interesting challenges at security checkpoints. Modern X-ray systems can usually see through packed camera gear without issues, but older machines or particularly dense configurations sometimes trigger secondary screening.
I organize my bag so cameras and lenses stay clearly visible, rather than creating dense blocks that obscure X-ray visibility.
Placing larger items on the outside edges and smaller items toward the center helps screeners see the contents more clearly.
Lithium battery regulations deserve specific attention. Most camera batteries fall well within allowed capacities for carry-on luggage, but if you’re traveling with drone batteries or large external power banks, you need to verify compliance.
I keep a printed chart of battery capacities for my gear because arguing with security personnel about watt-hours never proves productive.
Batteries must travel in carry-on luggage rather than checked bags, so factor this into your packing.
The quick-access features of your bag matter more at airports than almost anywhere else. When you’re trying to pull out your laptop and camera for screening, bags with organized compartments and clear separation make the process dramatically faster.
I’ve consistently found that spending an extra 2 minutes organizing my bag before getting in the security line saves me 10 minutes during the actual screening.
Organizing Your Bag for Efficient Shooting Workflows
How you pack your camera backpack impacts your shooting efficiency as much as which bag you choose. The organization system you develop should minimize the time between deciding you need a piece of gear and actually having it in your hands, ready to use.
The most frequently accessed items should occupy the most accessible positions. This sounds obvious, but I regularly see photographers pack their primary lens deep in their bag while keeping rarely-used accessories in easy-reach pockets.
Your main camera body should be positioned in whatever spot lets you grab it fastest. For most bags, this means the top compartment or a dedicated quick-access pocket.
Secondary bodies and backup lenses can occupy less accessible positions since you’ll need them less often.
Group related items together rather than organizing by size or value. All batteries go together, all memory cards stay in one location, and all cleaning supplies share a pocket.
When you need to swap a battery, you go to a specific place rather than searching through many compartments.
This organizational consistency becomes automatic over time, letting you access gear by feel without looking. I can swap batteries or memory cards without even glancing at my bag because muscle memory takes over.
Use smaller organizing pouches within your main bag for small items that otherwise get lost. Memory card wallets, battery cases, and cable organizers prevent the frustrating experience of dumping out your entire bag to find a specific SD card.
These organizers prove particularly valuable during location changes when you’re repacking gear; everything stays grouped rather than scattering.
Consider your shooting style when organizing gear position. If you frequently swap between wide and telephoto perspectives, position those lenses for quick access.
If you primarily work with one lens and only occasionally change, pack backup lenses deeper in the bag.
Your organization should align with your actual behavior patterns rather than a theoretical ideal.
Frequently Asked Questions
What size camera backpack do I need for a mirrorless camera?
For a single mirrorless camera body and two to three lenses, a 20-25-liter camera backpack provides adequate space for accessories. Mirrorless systems take up considerably less space than DSLR setups, so you can work with smaller, lighter bags.
If you’re carrying a drone in addition to camera gear, consider 30-35 liters.
Can you bring a camera backpack as a carry-on?
Most camera backpacks between 20-45 liters qualify as carry-on luggage on major airlines, though budget carriers may have stricter requirements. Check your specific airline’s dimension limits before traveling.
Bags under 40 liters typically fit under the seat or in overhead bins without issues.
Are Peak Design camera bags worth the money?
Peak Design bags cost more than budget choices but deliver excellent build quality, thoughtful design features, and strong warranties.
The modular system works particularly well for people who need their bag to function for both photography and general travel. I’ve used mine for three years with zero failures.
How do you pack a camera backpack for international travel?
Place your heaviest gear closest to your back for better weight distribution. Keep frequently accessed items in quick-reach pockets.
Use the bottom compartment for items you won’t need during travel. Remove batteries from devices and store them in a dedicated case. Pack a rain cover in an accessible location.
What’s the difference between camera backpacks and regular backpacks?
Camera backpacks use multi-density foam padding systems that protect against impacts, customizable dividers to prevent gear from shifting, reinforced construction at stress points, and often include weather protection features.
Regular backpacks lack the specialized padding and organization systems needed for expensive camera equipment.
Do I need a waterproof camera bag?
Water-resistant materials handle light rain and splashes adequately for most travel situations. Fully waterproof bags with sealed seams and waterproof zippers become necessary only if you regularly shoot in heavy rain, near water, or in extreme weather conditions.
Most quality camera bags include rain covers for occasional wet conditions.
Can camera backpacks fit a 15-inch laptop?
Most camera backpacks in the 25-45 liter range include dedicated laptop compartments that accommodate 15-16 inch laptops. Smaller bags, around 20 liters, may only fit 13-14-inch laptops.
Check the specific bag’s laptop compartment dimensions before purchasing if computer storage matters to your workflow.
How much weight can you carry in a camera backpack?
Comfortably carrying 20-25 pounds depends on having a bag with a proper hip belt, weight transfer, and adequate padding. Bags with basic shoulder straps become uncomfortable above 15 pounds.
Professional camera backpacks with full-harness systems can handle 30-35 pounds, though this is near the maximum recommended weight for extended carrying.
Are Lowepro camera bags of good quality?
Lowepro produces reliable camera bags at many price points with generally good build quality and durability. Their ProTactic series represents professional-grade construction that withstands heavy use.
Lower-priced Lowepro models offer decent value for casual users, though they use less robust materials than premium options.
Key Takeaways
Camera backpacks function as mobile workstations rather than simple protective carriers, requiring different design considerations than regular backpacks.
Multi-density foam padding systems protect expensive gear by distributing impact force across many layers that compress at different rates.
Choosing bag size based on your actual working kit, rather than the theoretical maximum capacity, prevents carrying unnecessary weight and bulk.
Mirrorless camera systems need significantly less space than DSLR setups, allowing travel creators to work with smaller, lighter bags.
Rear panel access provides security in crowded environments by keeping camera compartments against your back where they can’t be accessed without your knowledge.
Modular insert systems let you use the same outer bag for both camera work and general travel by removing camera-specific components when not shooting.
Proper weight distribution through hip belts and load-lifter straps reduces fatigue during extended carrying compared to bags that hang all the weight from the shoulders.
Airport carry-on compliance requires checking the specific airline’s size requirements, since budget carriers often enforce stricter size limits than major airlines.
The organization strategy in your bag directly affects shooting efficiency: frequently used items are placed in quick-reach locations, and related items are grouped together.
Weather protection levels vary dramatically between bags, with water-resistant materials handling light rain while fully waterproof construction needs sealed seams and weatherproof zippers for extreme conditions.
Authority Resources for Further Learning
- Get deep camera test results with DPReview’s reviews and learning hub.
- Follow practical gear breakdowns on CameraLabs camera and lens guides.